Proud to announce "Ocean Star Empire - Dots On Maps" album will be post-produced by THE TEAM - Maxim Makus Kurushyn for mastering, Hood Art for graphical design, Yael Eshkar for illustration, and Oz Ohayon for promo cds pressing. Excited!
Monday, September 22, 2014
Monday, September 8, 2014
Faxi Nadu - The Ambient File DJ Set 2011 - Over six hours of flowing, deep, introspective chill-out music for the soul
Faxi Nadu - The Ambient File DJ Set 2011
Ever wondered what do Biosphere, Mark Snow, Faithless, Vesica Piscis, Angelo Badalamenti, Elvis Presley, Miranda, Adham Shaik, Vivaldi, Scatman and Faxi Nadu have in common? Well, look no further....
<3 Over six hours of flowing, deep, introspective chill-out music for the soul <3
I was supposed to play this in this huge festival here in Israel that was setup on the beach. The dudes had it lined up so they had this huge full-on stage with about a million turbo sounds, then literally five meters from it the chill-out stage with two whimpy speakers, and another 5 meters to the other side the prog stage with another half million turbo sounds. How is someone supposed to chill while sandwiched between both stages is beyond me, let alone here the chill-out music ;)... anyways, as I was starting to play I made the horrible mistake of taking a chair from the chai area so I could chill, you know, with the chill-out music I was to play for seven hours. This led to screams by the chai people that the chairs are for costumers, and not for me, and that led to me giving them the finger and in true southpark fashion giving them the "screw you guys, i'm going home" treatment. I did get back home and record all the tracks and mini-sets and pieces I prepared into a set, and broke it down to 11 parts to manage a fun listening experience and an easier upload. The idea here was to provide a soundscaping experience and pay homage to some unique music I have come across from various sources and not just play the usual corny psy-chill loop. For me it feels like this is some of my best work putting together a full, rich journey, through various interpretations of "chill". So here you go :)
Here is the complete tracklist:
---part 1---
biosphere - houses on the hill
ishaq - cyandragonfly
yehuda poliker - late maybe early
ishaq - yu listen
enya - council of elrond
wonderland falling yesterday - yesterday's light circus
---part 2---
biosphere - fast atom escape
biosphere - heat leak
thom brenan - pond life
exuviae - forever and a day
vir unis - particle path
star sounds orchestra - new lyra
twins peaks - love theme
---part 3---
thomm brenan - mist
biosphere - hyperborea
exuviae - aquaphobia
spacecraft - the summon
vesica piscis remixed by elmooht - cathedral
vesica piscis remixed by elmooht - living crystal
---part 4---
adham shaik - journey to the sun
adham shaik - ganges by full moon
elmooht - monistary
viewing infinite space
black mizi pro duck sun - sun lug
biosphere - chukhung
biosphere - antennaria
---part 5---
porn sword tobbaco - sad bockshappy pussys
adham shaik - emergance
adham shaik - liquid evolution
---part 6---
elmooht - meldok
vidna obmana - spore
seti - beacon 8
the nightmare before christmas - opening
vivaldi - concerto no.3 in f 'l'autunno'
klaus doldinger - angrif
mike oldfield - tubular bells
elmooht - secrets in the snow
---part 7---
bernard herman - day the earth
cider groove - epitaph
elvis presly - are you lonesome tonight
dick danger - cycle
3x!13 - 01
3x!13 - slowly inside
pop - 2
mystical sun - waters of life
mystical sun - river goddess
nils petter molvaer - decisions
damagez - back east faxi nadu remix
elmooht - alyssa
---part 8---
elmooht - beam focus
chris meloche - track 1
brian eno - triennale
biosphere - as the sun kissed the horrizon
secede - ballroom arcade
elmooht - the river kingdom
biosphere - poa alpina
biosphere - two ocean plateau
spacecraft - galileo
elmooht vs dudi and damagez - unnamed
vir unis - glide
elmooht and dudi - malaki
elmooht - lab30 small bit
---part 9---
black mizi pro duck sun - mook
chris meloche
elmooht - orbital platform
chris meloche
klaus doldinger
nebulaII - tube
seti - journey
mark snow - x-files theme
angelo badalamenti - the secretary theme
black mizi pro duck sun - maklakaturim
tangerine dream - remote viewing
---part 10---
khonnor - megan's present
elmooht - unkown
faithless - last this day
three drives - greece2000
union jack - watrerdrums
miranda - intro
faithless - nate's tune
robert miles - fable
phylum sinter - a conception serene remix
adham shaikh - sri kainchih temple bells
---part 11---
faxi nadu - tgl remix
scatman and bmp medley
oxygenfad - she's been around
elmooht - sortie
jega - inertia
faxi nadu - raphael's spirit remix
faithless - why go
Thursday, August 21, 2014
Online Faxi Nadu interview at Mushroom Magazine
As an artist, what role do you think you play in society?
It depends for who. Entertainer is the obvious, but I would also like to think we can provoke thought, not even regarding a specific subject, but an inner dialog for the listener. We want to take you places, to tell you stories that are open to your own interpretation.
Read the full interview article here:
Last 2 CD Copies of The Purest Form! Big bonuses to the ones that grab them!

there are just 2 copies of this on CD left!!!!!!!!!!!!!
the last two awesome people that grab it will get not only the cd you ordered BUT also:
- faxi nadu - the way back (digipak cd)
- faxi nadu - the last kick of your life (sleeve cd)
- faxi nadu - modern knight (sleeve cd)
- faxi nadu -kosmicheskaya mechta (sleeve cd)
aaaaaaaaaaaaaand faxi nadu stickers and surprise extras....... how much? 7e?!?!?!!? including shipping?!?!?!? wtf lol no brainer go for it, grab it here:
Tuesday, August 5, 2014
Faxi Nadu - The Dangling Thread - 06 - The Fall Of Gamla Feat Spinney Lainey

Situated at the southern part of the Golan, overlooking the Sea of Galilee, Gamla was built on a steep hill shaped like a camel's hump, from which it derives its name (Gamla meaning 'camel' in Aramaic). Although the site was inhabited since the Early Bronze Age, the city appears to have been founded as a Seleucid fort during the Syrian Wars (3rd century BCE)[2] which later became a civilian settlement. Jews inhabited it from the last quarter of the 2nd century BCE, and it was annexed to the Hasmonean state under king Alexander Jannaeus in c. 81 BCE.[4]
Josephus Flavius, Commander of Galilee during the Jewish Revolt against Rome, in 66 CE fortified Gamla as his main stronghold on the Golan.[5] Josephus gives a very detailed topographical description of the city and the steep ravines which precluded the need to build a wall around it. Only along the northern saddle, at the town's eastern extremity, was a 350 meters-long wall built. It was constructed by blocking gaps between existing houses and destroying houses that lay in its way.[6][7]
Initially loyal to the Romans, Gamla turned rebellious under the influence of refugees from other locations.[3] It was one of only five cities in the Galilee and Golan who stood against Vespasian's legions, reflecting the cooperation between the local population and the rebels.[8] At the time of the revolt, the town minted its own coins, probably more as a means of propaganda than as currency. Bearing the inscription "For the redemption of Jerusalem the H(oly)" in a mixture of paleo-Hebrew (biblical) and Aramaic, only 6 of these coins have ever been found.[3]
Josephus also provides a detailed description of the Roman siege and conquest of Gamla in 67 CE by components of legions X Fretensis, XV Apollinaris and V Macedonica.[9] The Romans first attempted to take the city by means of a siege ramp, but were repulsed by the defenders. Only on the second attempt did the Romans succeed in breaching the walls at three different locations and invading the city. They then engaged the Jewish defenders in hand-to-hand combat up the steep hill. Fighting in the cramped streets from an inferior position, the Roman soldiers attempted to defend themselves from the roofs. These subsequently collapsed under the heavy weight, killing many soldiers[6] and forcing a Roman retreat. The legionnaires re-entered the town a few days later, eventually beating Jewish resistance and completing the capture of Gamla.[10]
According to Josephus, some 4,000 inhabitants were slaughtered, while 5,000, trying to escape down the steep northern slope, were either trampled to death, fell or perhaps threw themselves down a ravine.[9] These appear to be exaggerated and the number of inhabitants on the eve of the revolt has been estimated at 3,000 - 4,000.[11] The notion that these inhabitants committed mass suicide has also been questioned, as the account appears to force an analogy with the story of the end of the siege of Masada, also recounted by Josephus. The Greek word Josephus used implies a hasty, clumsy flight while suicide is forbidden under most circumstances by Jewish law.
Wednesday, July 2, 2014
Faxi's Max/Msp Modular Elementals - Proof of Concept Vid
Working on a batch of higher level modules for Max/Msp and Max4Live - an attempt to bridge some of the gap between musician and programer and make it quicker and easier to involve max within a producing context. Introducting the basoc idea and the concept of "bricks" and "blocks". More to come...
Sunday, June 29, 2014

Thursday, June 26, 2014
Max/Msp - Platform Overview and Getting Started
Pros:
- Very mature platform.- Large userbase with many power users
- Core synthesis
- Cleanest interface you could ask for
- Loads of 3rd party modules
- Extensive documentation - help files, tutorials, referances
- Max4live
- Video and graphical synthesis
- No limits
Cons:
- Steep learning curve- Programer mindset > musician mindset
- Far from instant
- "On the fly" sound quality

Max/Msp has been around for ages, and in a way, like my pal Phylum Sinter said, "you are about ten years too late". I think that might even be a good thing, as the platform is now very mature with endless amounts of documentation and learning tools at your disposal. Like I was told myself, the first thing you have to understand about Max, is that it isn't a modular, it is a visual programing platform. That is a big point to consider because I see it as both a pro and a con. On the one hand, yes, for a musician looking for a quick hookup to modular synthesis it is intimidating but on the other hand if you can learn and survive max, you will be able to master any synthesis platform. Learning Max means learning the very basic functions and why things work the way they do, and even if you don't stick with this platform in the long run you will still learn a ton by getting into the core of synthesis and digital audio. Getting more advanced, Max also includes a whole set of objects for video and graphical manipulation, that interact in the same environment with the audio objects. Max will also allow you to code your own objects with generative script tools and 3rd party integration with programs such as Csound.
The thing i liked the most about this platform is that whenever I hit a wall, a Google search for the problem always found me a solution - perhaps via a youtube tutorial, a forum post or a posted patch. In extreme cases where no direct onine information was found i was able to move forward by posting on max/msp Facebook groups or chatting with advanced users.

Max 4 Live brings in awesome direct sequencer integration that in my view enhances both Ableton and Live tenfold. It is nice to see DAWs adopting powerful design platforms, and while FL Studio's Flowstone is mighty impressive I think Ableton scores the biggest win by getting Max onboard.
So, you are convinced! You want to, you open a new Max 4 Live device, click edit and..... what now?!!?!?
If you are totally unfamilar with visual programing or modular synthesis, I can indulge and hit you up with my own modular synthesis course that will get you the basic ideas of what this world is about. But even if you are a synthesis and modular veteran, Max is a different animal and will require you approach it with a bit of a programing mindset like I mentioned.
The way I made the very first steps myself was by thinking of something very simple to build and then thinking about all the things I need to know in order to build it. For example, a simplest one oscillator synth with a filter and volume envelope. This will get you researching the things you will need to know in order to build this, like how to connect MIDI and hook up your filter knobs. Hit the Youtube channels in the bottom of this article for a bunch of tutorials to get going.
Every module comes both with a help file and a referance file and both are available with a right click on the module within any max patch. These are your best friends and your basic source of information. Both Max and Max 4 Live also come with a bunch of example patches that you can have a look at to get things going.
Once you start building, the online resources you can find provide a gold mine of solutions, I found that I can integrate various circuits and ideas from various sources into my patches. A lot of people share objects and ideas for free and you are encouraged to use them.
Sound quality in Max can be a dual-sword. Being as deep as it is, if you know what you are doing you can get into the core of things and get amazing sound quality out of it. BUT, if you are just connecting some core modules, don't expect it to sound like a Virus straight out of the box. This isn't to say you can't get amazing results, it just means it will take some work.
If you are looking for a quick modular system, maybe have a look at something else, but if you are looking for a deep platform with many aspects and great interaction with Ableton Live - dive right in.

Some links to get you started:
The program: http://cycling74.com/Obvious, but a ton of info and power users here: http://cycling74.com/forums/
Ableton integration: https://www.ableton.com/en/live/max-for-live/
3rd party module database: http://www.maxobjects.com/
Very good, very big, very serious PDF all about Max from basics to the hardcore:
http://www.paulschuette.com/wp-content/uploads/2013/01/DEMYSTIFYING-MAXMSP.pdf
Essential YT channels
Cycling 74 (Cool Max stuff): https://www.youtube.com/channel/UCqSNdDNH1Iq25ucNmqaGvigDude 837 (Tutorials): https://www.youtube.com/channel/UCHen0AQzqOMaPbpjYBhfsTA
Must 1002:(Tutorials) https://www.youtube.com/channel/UCkYxXxyw_K_HT271d-AKv0A
Eric Ameres (Tutorials): https://www.youtube.com/channel/UCzhVmOq43r5prl7u9M72wuA
Facebook Groups:

Wednesday, June 25, 2014
Three tracks released on Goachestra's VA Vol. 1
Three new Faxi Nadu tracks. One is a sort of morning trance with a bit of an experimental vibe, a remix to Algae Bloom's track Thank You. The second is a bit of a silly floaty goa type tune and the third is a borderline darkish ordeal. Released on a free download compilation by Goachestra Event Records.
Grab the whole album for free:
https://www.facebook.com/pages/Goachestra-Event-Records-GER/231379860249512
You can also download our three tracks through our Soundcloud:
https://soundcloud.com/faxinadu
Grab the whole album for free:
https://www.facebook.com/pages/Goachestra-Event-Records-GER/231379860249512
You can also download our three tracks through our Soundcloud:
https://soundcloud.com/faxinadu
Monday, June 23, 2014
Faxi Nadu and Ocean Star Empire - Summer Solstice 2014 DI.FM
Originally broadcast at DI.FM Psytrance channel 210614
http://www.di.fm/goapsy/
Just a little history as some people on the original broadcast's posting have mentioned. As Faxi Nadu I produce music for over a decade. In 2008 I took almost a three years break from production and at that time hosted a trance radio show, made some parties and all that. From that time come the various oldschool goa sets that are floating online :) Faxi Nadu music started basically as silly nintendoish noodles and went through and still is going through constant change, one of the things I pride on is that every one of our albums is a totally different story. In 2011 I met Oss who became both my partner in music and my wife and now the Faxi Nadu name is both of us. She has progressively taken part since The Last Kick of Your Life album and today she is a full partner in crime :) In 2013 Nuno Muacho (Nomad Moon from Portugal), Leander Winkler (Killik from Germany) and I met online and started to talk about music and from that the Ocean Star Empire project was born. Leander has left the group after the debut album, but we have been joined by Kyle Ramos (Bacchanalian Bass from the USA). There is a Faxi Nadu album waiting in the wings for 2015, and we are 6 tracks into the next Ocean Star Empire one. Also at the moment Oss and I are working on a live act where we perform REAL live with synths and controllers and jam the music.
Here is the complete tracklist of the Solstice Set.
Ocean Star Empire - Arrival (The Purest Form 2014)
Faxi Nadu - After People (The Last Kick of your Life 2011)
Faxi Nadu - In Another Life (In Another Life 2012)
Manny Zagri - Absence Mmakes the Heart Go Yonder (Faxi Remix) (2013 unrl)
Faxi Nadu - Fusion Platform (The Way Back 2014)
Reefer Decree - Target Practice (Faxi Nadu Remix) (2014 unrl)
Kolishin - Fingerprints (Faxi Nadu Remix) (Never Denied 2013)
Ocean Star Empire - Three Dots On a Map (The Purest Form 2014)
Ocean Star Empire - How Small We Are (The Purest Form 2014)
Faxi Nadu - Tears of the Morning Flower (unrl -The Dangling Thread 2015)
Faxi Nadu - The Other Day (The Way Back 2014)
Faxi Nadu - Half a Ship in a Bottle (The Way Back 2014)
Killik - Spaetzle (Ocean Star Empire Remix) (The Purest Form 2014)
Ocean Star Empire - Woven Drops (The Purest Form 2014)
Ocean Star Empire - Rain From Within (The Purest Form 2014)
Bacchanalian Bass - Astroidial Artifacts (Ocean Star Empire Remix) (unrl)
Syntezia - Chaotic Alien (Faxi Nadu Remix) (Free Download on SC 2008)
Ocean Star Empire - Nuno's Abduction (The Purest Form 2014)
Syntezia - Microman (Faxi Nadu Remix) (Free Download on SC 2008)
TG Virus - Kilomix 98 (Faxi Nadu 2012 Classic Trance Remix) (Free Download)
Faxi Nadu - Who We Are (Who We Are 2012)
Faxi Nadu - Ancient Explorers (Kosmicheskaya Mechta 2012)
Faxi Nadu - Golden Axe (2011 Remix) (Free Download on SC)
Faxi Nadu feat. Eli Marshak - Boundless Love (Remix) (unrl 2009)
Ocean Star Empire - All Good Things (The Purest Form 2014)
You can find The Purest Form and The Way Back on bandcamp, still have a few cds left -
http://faxinadu.bandcamp.com/
http://oceanstarempire.bandcamp.com/
Thursday, June 19, 2014


Wednesday, June 11, 2014
Faxi Nadu - Doric Prime (Full Album 2013) - Complete album stream!
Finally this album is up for stream! deep geometric tech/chill/rabbithole! Share around if you like it.
Monday, June 9, 2014
Ocean Star Empire "Purity" biz cards - a gift from Klout and Moo

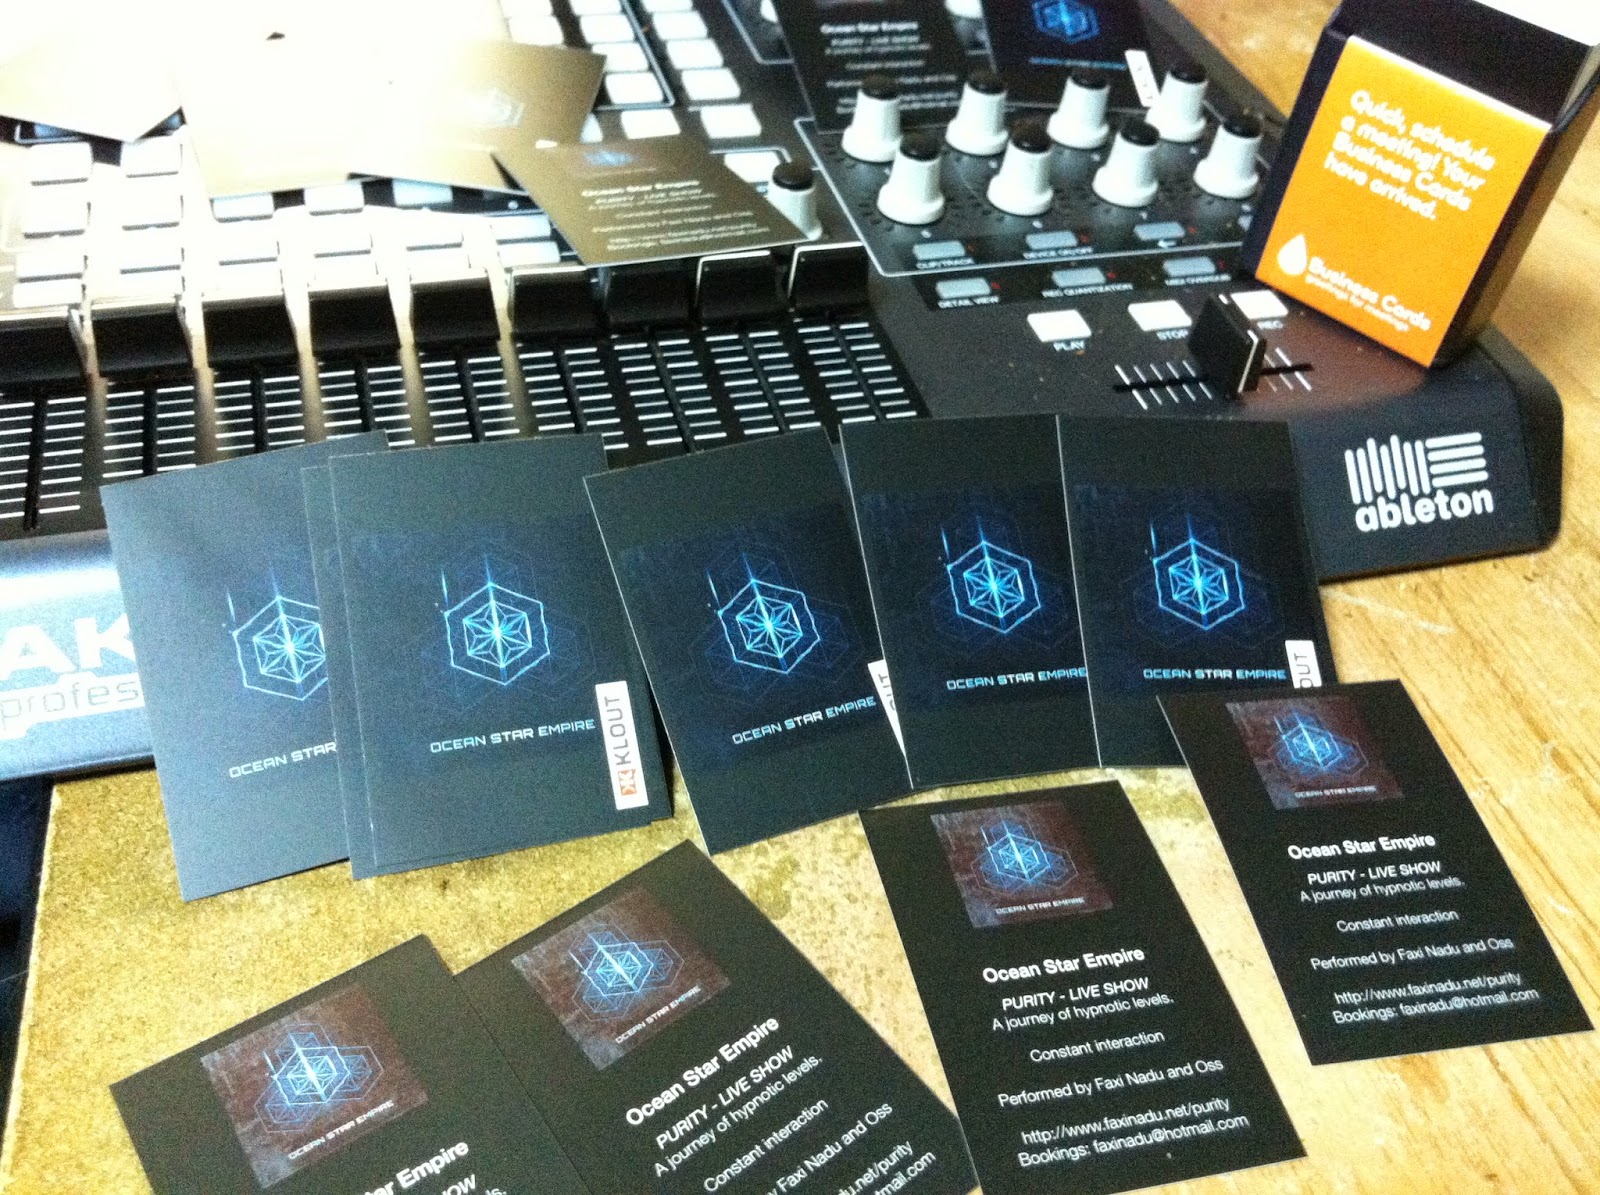
Got a very nice gift from Klout and moo.com ! a perk for 50 free Ocean Star Empire business cards, they have just arrived! thanks!!
Ocean Star Empire - A Nebula Portside - LIVE STUDIO VERSION
Performing "A Nebula Portside" in our studio.
Bookings: faxinadu@hotmail.com
Saturday, June 7, 2014
Faxi Nadu - Ocean Star Empire Purity Live Act at Babaganousha Radio 070614 - Recorded LIVE show
Bookings: faxinadu@hotmail.com
Ocean Star Empire's Purity LIVE show is performed by band members Faxi Nadu and Oss - a journey of hypnotic levels. Real live psychedelic trance with constant interaction between the performers and the music using synths and controllers.
Gear:
Akai Mpk25, Akai APC40, Novation Launchpad, Access Virus, Waldorf Rocket
Perforned and recorded live over the web on June 7 2014 at Babaganousha Radio
www.babagaousha.net
LFO Concepts Tutorial - Designing a full featured LFO Circuit (Synth Edit)
Taking a look at LFO concepts - what an lfo and the controls for it are built from. Using the Synth Edit syntax for designing an LFO circuit, but this shows general concepts good for any design platform.
Friday, June 6, 2014
Session with Rebekah Nitsan Feiticeira, a childhood friend of Oss
No midi no scale just guitar doing weird pitches with fx and vocs with delays on them :)
Session with Rebekah Nitsan Feiticeira, a childhood friend of Oss.


Wednesday, June 4, 2014
Ableton Live Track Setup - Our Live Show Concept Walkthrough
Walkthrough of the concept and setup for our "purity" live show. Gear used and gear usage in interaction with Ableton Live. Taking a look at the workings of the project file for the track 3 Dots On a Map.
Tuesday, June 3, 2014

Monday, June 2, 2014
Max4Live Waldorf Rocket Controller (the device + tutorial)
Getting into Max4Live (myself included) by looking at building a controller for a hardware synth, in this case for the Waldorf Rocket. Also a (very confused and confusing!) look at a usage for basic math functions in order to scale values.
If you are here for the device, grab it here:
Friday, May 30, 2014
Show Debut!!! Ocean Star Empire and Faxi Nadu PURITY LIVE ACT - 7.6.14 - Babaganousha Radio

Saturday 7.6.2014 - 1600 (GMT) - 1800 (CSET)
Ocean Star Empire's PURITY LIVE ACT
Debut ! ! !
Performed by Faxi Nadu and Oss
A journey of hypnotic levels.
Real live psychedelic trance with constant interaction between the performers and the music using synths and controllers.
Far beyond the farthest light is the domain of the galactic empire, hailing from the deep valley's of the ocean star, flowing down the river of time through the rise and fall of civilizations.
LISTEN HERE -
Times:
1700 GMT
0900 Pacific USA Time (GMT -7)
1200 Eastern USA Time (GMT -4)
1800 Central Europe Time (GMT+2)
1900 Israel Time (GMT+3)

Thursday, May 29, 2014
Tuesday, May 27, 2014
Monday, May 26, 2014
Sunday, May 25, 2014
Is it Russian media again!?!?!?1 LOL!
Ok... this has NOTHING to do with our music, but if you get it, then your psytrance-freak-get-a-life level is full retard :) <3

Saturday, May 24, 2014


Sunday, May 18, 2014

AKAI APC40 + MPK25 Reviews
We are very busy putting together our new live act and as part of that got some new gear, here are some imrpessions of the AKAI APC40 and MPK25.
Friday, May 16, 2014
Attention Producers! Multiple X/Y Midi Control for 10$ ? Yeap!
So!! I finally got my gamepad to work well as a midi controller! There are a load of options for doing this, (and yeah I do remember Fruity Loops could do it internally to some degree since about v3) and you would think it would be very simple, but in my case I had to go through a bunch of apps and trial and error before i got it to work. Here is what i used that finally worked using Rejoice and Midi Yoke. You can even connect multiple joysticks by running multiple instances of Rejoice. The program itself has a small footprint and I'm sure you can run a few alongside your DAW and not feel any resource drain.
- Midi Yoke:
This is a "virtual" midi driver that will take the info from Rejoice and translate it into midi messages.
Now, the thing is, there is no "windows 7" version, so if you try to install it on 7, you will get an error and it won't install. What you need to do is run the installer in compatibility mode for "older version of windows", then it works. After the install the program runs in windows 7 with no problems.
Get Midi Yoke here - http://www.midiox.com/
- Rejoice:
This is basically a mapper that will let you config joystick actions into midi control numbers.
Grab it here - http://raritiesvault.net/bcd3000/viewtopic.php?f=4&t=19&start=0
The rejoice manual will take it from there, basically all you need to do after installing both aps is in Rejoice choosing Midi Yoke as your Midi Out, and in your DAW enabling Midi Yoke as an available input. Then, in Rejoice itself it is pretty simple to configure X/Y axis and buttons as midi control numbers (if you have a hard time the Rejoice manual shows you step by step). Now your joystick outputs midi like any other controller, and all you need to do is map it like you would map any other device in your DAW.
Here is an amazing link I found containing a boatload of other aps that create midi from non-midi devices and manipulate things:
http://forum.djtechtools.com/showthread.php?t=2862
Friday, April 18, 2014
Thursday, April 10, 2014
The Dangling Thread - running track project video
FRESH straight from the oven - running track from daw to video, "The Dangling Thread". Ambitious attempt at harmonic-hypnotic trance by starting out from the very start with a 256 bar loop and then developing that.
Sunday, April 6, 2014
Saturday, April 5, 2014
Harmonic Layering and Hypnotic Trance
we've been exploring some "new" production methods and way of thinking lately, and when we tell our friends about it they indicate they don't really get what we mean. it is in strict terms "progressive" but the end result doesn't have a lot in common with the prog sound and vibe.
instead of working with a short loop and expanding it, we are starting with a really long loop to begin with - 128, 256 bars. each channel evolves within that loop, some can be as hooks and some can be with evolving scoring, but the idea is that the automations evolve and dynamically change each channel, almost all the channels have a ton of delay with massive feedback, and as more channels are introduced the interaction between them creates harmonizing and story. the channels pretty much all run at the same time together, with little interference in editing, for many minutes. there is little room for a huge bass or a lot of drums because the synth layers "steal" the spectrum. the snare and hats evolution and interaction provide the progression of the groove.
end result - almost a new subgenre - part goa, part prog, part something else. there is no instant gratification smash-the-dancefloor type of vibe with this, but it is very deep and mushroomy.... you get something that is both oldschool and simplistic, yet clever and refined, i would dare say "classy" and very musical, like waves of an ocean.
Friday, April 4, 2014
Synth Edit 3 Osc Synth Tutorial - (Original publication September 2005 in Postunder Records Minimag)
Synth Edit 3 Osc Synth Tutorial

This tutorial is free and was written with lots of love by Faxi Nadu
When you play around with analog or software synths, they may seem mysterious and magical but in fact, most synths incorporate similar ideas and methods. If you udnerstand the basic ideas of synthesis, and the concepts behind synth design you can further enhance your skills as a musician. In this multi-part tutorial we will discuss the principles of synthesis while building our own vst synths. This tutorial assumes you have played around with synthesizers and know a thing or two about the "musical" aspect of synthesis.
To follow the examples and build your own you need synthedit. The current versions are available for a free demo and for purchase at www.synthedit.com
In this issue we will go right ahead and talk about various basic building blocks (and how they interact) of many common synth designs classified as "subtractive synths". A subtractive synth is called that because the sounds are achieved mainly by subtracting frequencies from a module called an "oscillator" using various techniques like filtering for example.
The original term "oscillator" was derived from analog circuits. When voltage is driven through certain electronic circuts it spins, meaning the current is swaying such that it produces audible frequencies. This spinning is called oscillation. In fact, all atomic structures have a set oscillating frequency, even the earth's oscillation (spinning) causes a resonance of 7.84hz (inaudible). The digital oscilators mimic this process and generate audible frequency tones. Right click on your empty project and go to insert. This brings up a sub menu with the various SE modules grouped by thier function. Go to waveform and chose oscillator. This will bring up an ocillator, and you now see the osc module on your project. Notice the various inputs and outputs labeled on the module. The inputs are used to control the oscillator's behaviour and the output passes on the audio results.


If we don't tell the osc when to start and stop playing, and for how long it will just make a continues tone without volume changes and without stopping. We want it to start each time we play a note and we want to be able to control how loud the tone is when we hit the key, while we hold it down, and after we let go. By being able to control these parameters dynamicaly we can mimick the way variousacoustic instruments and "natural" sounds change thier volume when we play them - for instance, a violin string's volume is slow to rise and slow to fall in comperison to a kick drum's sharp volume as it is hit and sharp drop back to quiet. right click on your project again and insert ADSR from the waveforn submenu. An ADSR is a type of envelope and is used to dynamicaly control various synthesis functions. When you route an ADSR to control a paramater you are essentialy giving it a "curve" that changes the value of the parameter . You define this curve using four points - Attach, Decay, Sustain, and Release. An aditional input called "gate" tells the evelope when to start running the curve and for how long, (in our case each time a new note is hit and how long the player is holding it down). Connect the gate output of the Midi to CV module into the gate input of the ADSR.
Now right click on your project and insert a slider from the controls submenu. Connect the slider signal out to the ADSR attack input. Insert 3 more sliders and connect one to decay, one to sustain and the third to release. The last input is for the overal level of the ADSR - in our case, it would be the overall volume of the tone. Insert an additional slider and connect it to the overall level input on the ADSR.

The ADSR in itself is just an envelope and is only used to control a paramater. For the ADSR to control the osc's volume we need to use an amplifier together with the ADSR. Insert a VCA from the modifiers menu. A VCA module stands for "Voltage Controled Amplifier" and it does just that - mimicking an amplifier. Connect the osc's audio out into the VCA signal input and the output of the ADSR into the volume input of the VCA. Your ADSR envelope now officialy controls the volume of your oscillator.

Right now, if you connect the audio output of the VCA module you got yourself a functional synth, but with a very limited range of sounds, and pretty limited control. Let's enhance this a bit by adding a filter module. A filters job is to receive an audio input and based on the filter settings output only some of the frequencies. The filter that we are goign to use is called a "low pass" filter. It works by letting only the frequencies to the left of the filter's "pitch" input pass to the output (most programs call it cutoff or frequency but techically it is also correct to call it pitch). The filter analyzes the incoming input and based on the design of the filter, audio is passed to the output while becoming softer in volume as it approaches the frequency at wich the knob is set at. This is called the filter's "slope". The filter module we ae going to use is called a "moog filter", implieing the slope is set to 24db per octave.
Go ahead and insert a moog filter module from the filters submenu. Notice the filter module itself has no volume input. The simplest way to control the overal volume of the synth without adding more modules, is to insert the filter before the VCA. That way, our "overall volume" slider on the ADSR will serve as a master volume for our synth. Disconnect the VCA's "signal" input from the oscilator. Connect the osc "audio out" to the filter's "signal" input, then connect the filter "output" to the VCA "signal" in. Now insert two more sliders (you can also highlight an existing slider module from your project and copy it - cntrl+c then paste it - cntrl+v). Connect one slider to the filter "pitch" and one to "resonance". Resonance, in a very simple manner of speaking, raises the volume around the value of the "pitch" slider. When you increase the resonance value, volume increases around the center frequency, but the higher the resonancse value is, the range of the area boosted covers less frequencies around the center. Some types of filters reach what is called "self-oscillation". It means that with the resonance value set all the way up, the filter produces its on audible tone, at the frequency of the "pitch" knob.

Lets take a minute to disccus the oscillator again. When we talked about oscillators, we mentioned that current driving through an electronic circut is the basis for the term. The part of the circut the electricity passes through to make the sound is called a "waveform". The elecricity would pass through these waveforms, flowing in positive to negative electronic waves and form repeating "cycles" of audible sound corresponding to the selected waveform. A cycle is essently one current pass through the waveform from positive electoronic values to negative, hence one crossing of the 0 value on the X axis of a wave editor is one pass. In fact, you can say any sound we know in nature has a waveform. If you take any sound, and analyse it in a wave editor, you will see it is built of waveforms - coming in many shapes and lengths and often changing in shape very rapidly. Longer cycles produce lower bass frequencies, and faster cycles produce high frequencies.
complex waveform

Oscillator modules like the one we are using useally allow you to choose between a number of simple "mathematical" waveforms. Many of these are traditional waveforms used every since synths have been around like the "sine", "square", and "triangle" for example. The names correspond to the shape of the sound as you would see it in a wave editor.
Notice on your oscillator module the green "waveform" input. In synthedit, green input are to be conected to the list entry module. Bring one out of the controls submenu and connect it to the osc's waveform input. You will notice that as soon as you connect the modules, choices of waveforms apear on the drop down menu of the list entry module. These are your choices of waveforms on this particular oscillator.

Right click on your project again and insert a sound out module from the Input/Output menu. Connect the VCA's output to the sound out's 1 and 2 inputs. Your synth should now be responding to incoming midi and all your sliders should function.

We got it to a point where it is functional, but various minor features can be added, greatly improving the synth's sound pallete and versatility. We will go ahead and make these improvements, and afterwards organise our synth's front panel, add our own background gfx and wrap it as a vsti instrument.
Ok. First thing, to make this synth have a wider, fatter sound let's add some more oscilators. Either copy and paste your current oscilator twice, or pull out two oscs from the waveform menu. Now copy and paste your waveform selector (list entry) from the first oscilator twice, and connect one to each of your new oscilator's waveform input. Also, connect the incoming midi pitch to the other osc's inputs.

We will now add an option to chose diffrent octaves for each of the oscilators. This will allow us to play broad layered sounds with each note we play. Go to the flow control menu, and drag out a module labeled switch (many->1). Now, from the controls menu drag out three slider modules. Connect all of these sliders to the switch module's spare input. Notice that as you connect each slider, a new spare input is opened. This way the switch module can be used for as many connections as desired, in our case three. Each time you connect, make sure you connect to a new spare input.

After connecting the sliders, right click on one of them and go to its properties menu. Change the "Title" to "0", Lo Value to "0" and change the "Appearance" from "Vert Slider" to "Button". This button will be the nuetral position of your octave selector, playing in the same octave as you play your midi notes. Now go to the second slider. Title it "+1", set lo value at "1", and again change the appearance to "Button". Setting the octave switcher to the "+1" position will play the oscilator at an octave above what your midi notes. Move on to the last slider, title it "-1", change lo value to "-1" and appearance to "Button". This position, as you probably guess already, will play the oscilator at an octave below your played midi notes. Right click on the switch module and go to properties. Name each choice slot according to the button attached to it. You can also title the switch "Octave" or something similar.


One more thing we need to do is go inside the switch module's properties, and label each input "-1,0,+1" according to the button attached to it.

We would like each of our oscilators to have its own octave selector. we can do this on our main project window by creating a set of buttons and switch for each oscilator. This way is perfectly fine, but in order to keep things neat, and to learn how to work with containers we will place the octave switcher we built inside a container. Right click on your project and insert a container from the main insert menu.

Highlight the switch and the three connecting buttons by dragging the mouse over them, or by clicking each one while holding the cntrl key. Once highlighted cut them (cntrl-x). Right click on the container module and go to its structure.

Paste (cntrl-v) the octave switcher modules in the container's structure.Notice that inside the container structure you have a small module titled IO Mod. This is the way the container recieves input and sends output to other modules. Connect the switch module's "output" and "Choice" to the IO Mod's spare input. Take care to connect to a new spare input, just like we did earlier with the switch module. You can now close the container's structure and go back to your main project structure.

Notice your container now has a "Choice" input and and output. Bring out a "List Entry" module from the "Controls" menu and connect it to your container's choice input. Notice how it automaticaly offers the 3 choices offered by the switch module: -1, 0, +1.

Now you can connect your octave selector container and choice to one oscilator, and copy/paste and then connect two more octave selectors for your other oscs. Notice that at this point we already have a lot more going on in our workspace than last month. You can start organizing it to keep it simple and effective for your mind and eyes like I have done in the next screenshot.

We can further enhance our control over pitch by fine tune control over each oscilator's pitch. By bieng able to detune one or more oscs we gain more control over the tonality of our synth as well as fatten it up further. Insert a slider from the controls menu and attach it to the first oscilator's pitch input. Right click on the slider, change title to "fine". The low and high values determine the range of the knob, in other words how much detuning is possible. You can experiment with diffrent settings, but usually low values are used. Set "Lo Value" to "-.01" and "Hi Value" to "0.1". Now make and then connect the same "Fine" sliders for your other two oscilators.


The last thing we are going to do in regards to pitch is add a pitchbender. Synth Edit has a ready made pitchbender module. Drag a pitch bender out of the controls menu and connect its output to the pitch input of all three of your oscilators.

Now that we have three oscilators, we surely would like to be able to control each osc's volume seperatly. Insert three VCA modules from the modifiers menu. Disconnect your first oscilator from the filter and connect each osc to one of the VCA module's signal input. Open three slider modules and connect one to each VCA's volume input. Now connect all threeVCAs to the filter's signal input.

On to the filter then! We are going to make an LFO and have it modulate the filter cutoff (pitch). LFO stands for Low Frequency Oscilator. It is an oscilator that outputs values swaying at different speads acording to the pitch of the oscilator, and affecting whatever it is attached to by a degree determined by a slider and a mulitplier. Lets make some sense into this by opening an oscilator fromt he waveform menu. connect a slider to the pitch input, enter the slider's properties and title it "Rate". In order for the LFO to function in the classic manner, we will need to limit the range of the rate button (the speed of the lfo). In one of the examples synth edit comes with, they set the low value to "-5" and the high value to "1". We will do the same as well, but these values can be experimented with.

Once done with that drag a list entry module from the controls menu and connect it to the waveform input on the oscilator. Insert a multiplier module from the math menu. Add a slider and connect it to the first input on the multiplier, right click on it and in the properties title the slider "Amount". Now connect your new oscilator's output to the other multiplier input.

Connect the multiplier output to the filter's pitch input. You now have the filter's pitch button controlling the cutoof frequency in a linear fashion and an LFO for creating variations in the filter's cutoff. When the amount knob of the LFO is turned all the way down, it is in its "off" position.

Just before we move on to setting up the panel, we are gonna add pulse width control and portamento. If you look on each of your oscilators you will see and input labeled "Pulse Width". Pulse width control on each oscilator is only enabeled when that oscilators waveform is set to pulse. When set to pulse, the width knob controls how wide each pulse cycle will be. Insert three additional sliders and connect one to each oscilator's pulse width input.
Portamento control allows for a synth to gradualy glide from one sent note to the next without actually defining the intermediate notes, rather than abruptly shifting to the new note when one is pressed. In Synth Edit portamento is easily achived. Just open up another slider and connect it to the portamento time input on the midi to cv module. When set to zero, there will be no portamento at all and the pitch will change normally from note to note. The higher the setting on the portamento knob the longer the pitch glide from note to not will be.

Whew! Done with the sound stuff for a bit. Moving on to the front panel layout. Right click on your project and chose "Panel Edit".

You'll see all your diffrent sliders and boxes in one big mess, with generally no way of knowing wich volume knob belongs to wich osc and so forth.

Start organising the mess by first going back to your structure and naming every slider with the apropriate oscillator or other component it relates to (in fact, in the future you should label each module with the appropriate oscilator set it belongs to as you work. Saves time and effort).. For instance, title the volume slider for the first oscilator "vol1" the second "vol2" and the third "vol3". Proceed and do the same with the fine, pulse width, waveform choices and octave selector for each oscilator as well. You can perhaps also rename the filter's pitch knob to something more familiar like "cut" to avoid cunfusion. After doing that you can then go back to the panel window and start grouping related sliders and boxes. Right click on any of your sliders. Looking in the Appearance list you see there are various choices of graphics and typs for your slider. Buttons and sliders do diffrent things, but you an change the slider appearance to a knob, small knob or other type of slider. Choice of slider gfx is really up to you. You can leave it all as it is, use smaller knobs for lesser used functions such as pulse width, change all to small knobs , etc. I will use vertical sliders because they react in a simple, predictable up-down fashion - but it is really up to you.

In order to wrap your synth as a vsti plugin you need to first select by draging and highlighting with your mouse the entire structure of the synth (all the modules on the structure window). Then, with everything highlighted you go to the main edit tab on the top bar and chose "Containerise Selection"

Right now alll you will see on your main structure is your synth container. Right click on it and go to the structure. All of your modules are in there, but you will also see a new module inside your container called "IO Mod". You have already seen this when we built containers for our octave selectors. What we will be doing in a minute is wrapping the container as a vsti instrument. This IO Mod serves as the means of communication for the between the vst host program and the synth, so we need to disconnect and delete the "Midi In" module and "Sound Out" module from our project. Connect your main VCA to the spare of the IO Mod, and the midi in from your Midi to CV to the 2nd spare that opens up.


Don't forget to give your container a name (right click, properties, title). This name will appear in your vst host program when you insert the instrument in a channel. It is also very important you size your panel window neatly around your synth. Whatver you see in your panel window is exactly how the synth will look in your vst host program. Four pictures back is how it should be, and following is how it should not:

Go to the main File menu and chose "Save As VST". You will get a menu with some fields to fill out: a name for your synth, the actual *.dll filename, vst identifier, specify if the plugin is a synth or effect (vst or vsti plugin, in our case vsti), and you can also add some comments in the info field.

Press OK when you are done, and that's it! Your synth is exported as a vst plugin. (Synth Edit may give you an error saying it can't find the directory. If this is the case go to your synth edit folder and create a folder called "vstplugins"). Copy your *.dll file to your vst host's vst plugin folder, and you are ready to use it.

You now know how to use synth edit and build most of the basic chains involved in moduler patching. You can try yourself to improve this synth - build another LFO and attach it to pitch, build an ADSR for the filter, add 17 oscillators - possibilities are endless. Try out and have fun.
Subscribe to:
Posts (Atom)